This was originally posted on Ortelius blog. Contributed by Natch Khongpasuk, Ortelius Contributor
If you're looking for a microservice management solution to take control of your microservice sprawl and regain an understanding of your application's configuration, Ortelius can do that for you. At a 10,000 foot view, Ortelius provides a method to track the collection of microservice versions that makeup your application version. It offers solutions for cataloging, versioning, sharing and deploying microservices across various platforms including cloud, virtual, and of course your Kubernetes clusters.
Choose the version of Ortelius that is best for you
Ortelius comes in 2 versions. You can host Ortelius on-premise or use the hosted SaaS version. DeployHub provides a SaaS edition of Ortelius where you can put it to work. This is the quickest way to get started. Or you can install Ortelius locally. There is full documentation on how to install Ortelius on-premise. For a quick look at installing Ortelius on-premise, this blog is a good place to start.
In this article, as the title suggests, we will focus on the SaaS version.
First step: Signing up
The SaaS version of Ortelius is based upon the Ortelius open source project and is hosted under the DeployHub site. To get started, follow this link. You will be asked to complete the sign-up form with basic information including the company name and project name. Hit "Signup" once you're done.
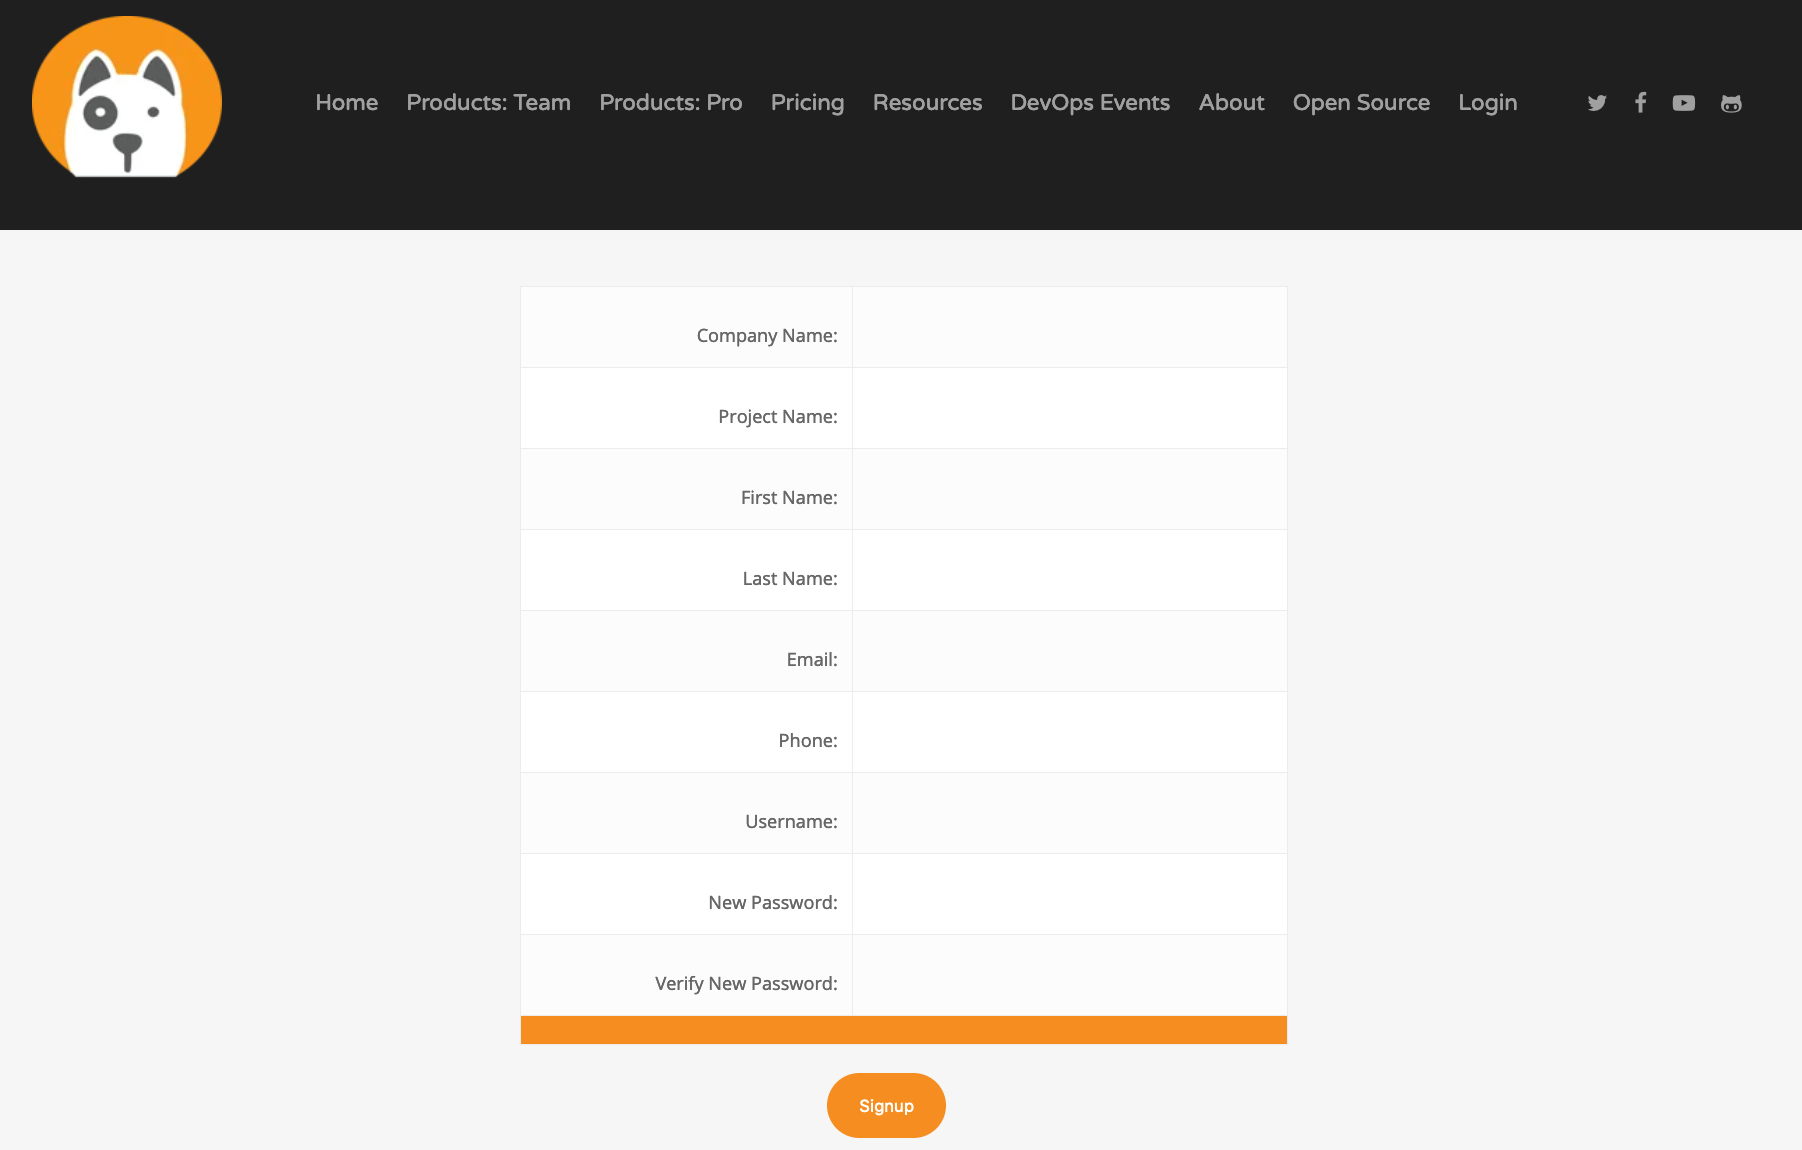
Note Company name: As part of the domain driven structure, the company name you insert is going to be created as a company domain under the global domain. Also, Your project name is going to be inserted under your company domain.
Interested in Domain Driven Design? Check out this article from DeployHub
As soon as you signup, a new Hipster Store sample application will be provisioned for you under your project. You will also receive an email from DeployHub. That email will contain your unique user ID as well as your client ID along with other links and useful information.
Yes, the next logical step is to go and check your email for the signup info.

From the email, you will need your client ID. This client ID will act as a token that gives you access between the Ortelius SaaS console and your local network.
Installing SaaS Proxy
For performing deployments into your environment, the Ortelius SaaS version uses a reverse proxy docker container which runs inside of your network. This proxy will allow communication between Ortelius and services inside your local network such as local Git repository or Jenkins servers. Every communication is always outbound from the proxy server. This means that you are not required to open any ports or disable any filter in your firewall to allow the packets to travel into your network. More detailed information about the reverse proxy can be found here
Now we're going to assume that you already have Docker installed on your machine. We will need the client ID sent to you in the email to configure the reverse proxy container. From your email, copy your client ID, open your favorite terminal and run the following command
export CLIENTID=<client ID>
Next, you will need the Reverse Proxy image to create and run a container. Lucky you, you do not need to create the proxy image from scratch. DeployHub already takes care of that for you. Pull the Reverse Proxy image from quay.io with the command below:
docker pull quay.io/deployhub/deployhub-rproxy:latest

Find the Reverse Proxy image SHA with the following command
docker images | grep deployhub-rproxy | grep latest

In my case, the image SHA is 68e1f2ef3320
Run the Reverse Proxy container with the docker run command below (substitute the image SHA value)
docker run -v ~/.ssh:/keys:Z -v ~/ortelius/data:/var/lib/pgsql/data:Z -v ~/ortelius/logs:/opt/ortelius/logs:Z -p 7171:8080 -d --hostname docker_dhpro 68e1f2ef3320

## check if the container is running by
docker container ls # or docker ps
Accessing Ortelius Console
Once you start the Reverse Proxy container, head over to the DeployHub console page with the following this link. You will be presented with the Ortelius Login popup. Fill in your credentials to authenticate yourself into the Ortelius console.
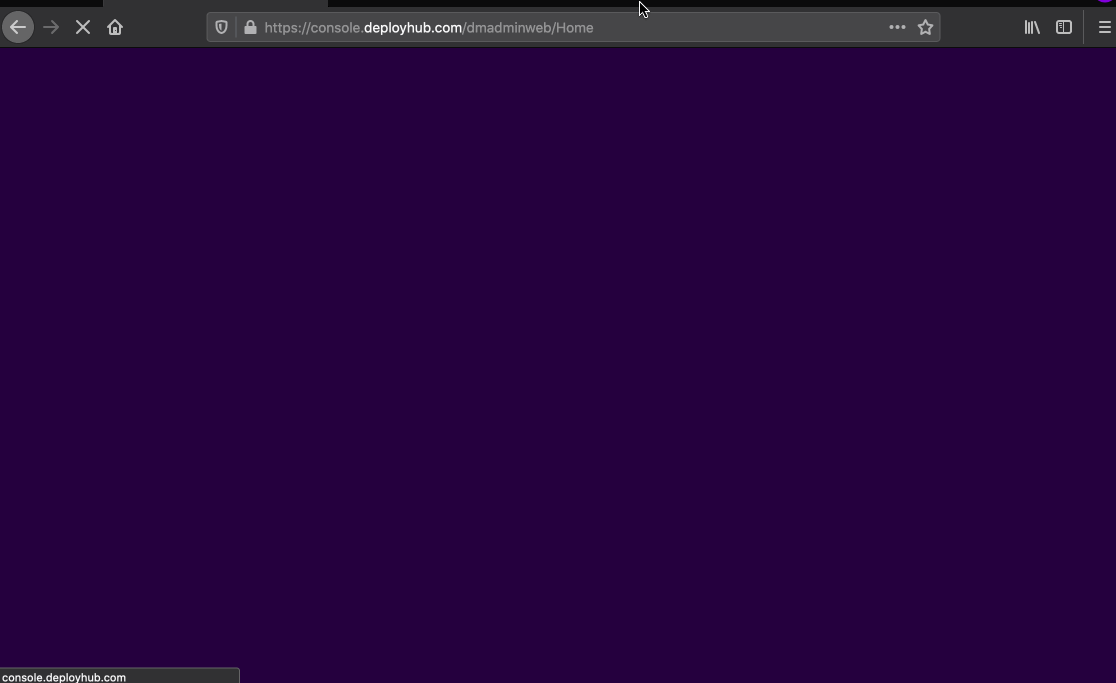
The Reverse Proxy status is located at the top right of the page. With a running Reverse Proxy container, you should be able to see the message 2 of 2 Reverse Proxy Running

Note You may see 1 of 2 Reverse Proxy Running message on your first login. Do not panic. It may take a couple of minutes for the Reverse Proxy container to get up and running and start communicating with the SaaS database.
Conclusion
Congratulations, that's basically all the process you need to get up and running. You are now ready to start using the SaaS version of Ortelius to either start experimenting the sample Hipster Store application to test the deployments or start creating your own components, application versions and building up your own microservice catalog on the SaaS version of Ortelius.